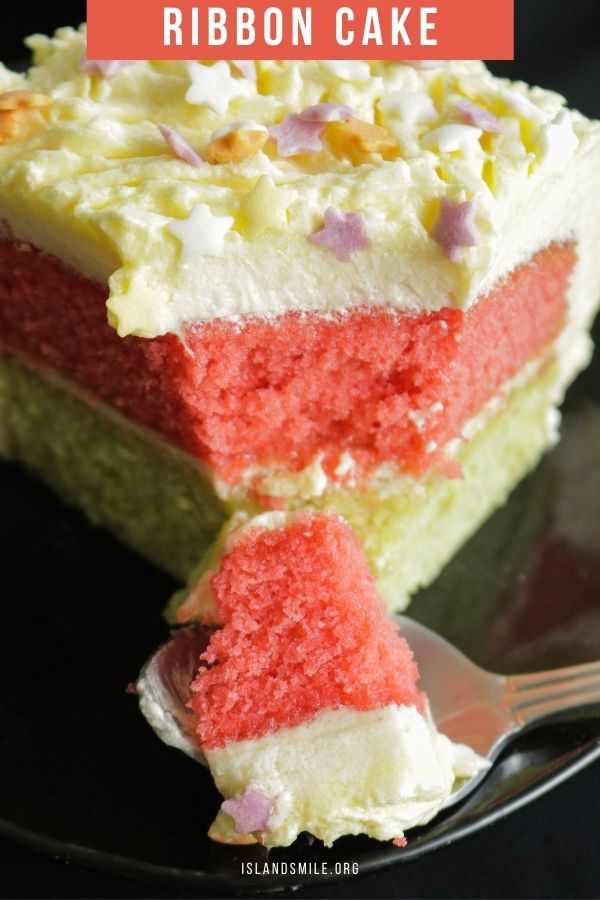
A ribbon cake is a two-layer vanilla cake covered in buttercream icing.
Try out this layered ribbon cake recipe for your special occasions.
From birthdays to festivals, you can now make this two-layer ribbon cake right at home.
With step-by-step instructions and tips, you can make this moist and fluffy cake easily.
So don’t forget to bookmark this cake recipe.
What is a ribbon cake?
- A ribbon cake consists of two layers.
- The two layers of vanilla cakes are sandwiched with a spread of buttercream icing in the middle and then covered with the same icing.
- With two contrasting colours of green and pink, the ribbon cake is always a popular choice.
- Try making this delicious ribbon cake for birthdays, Christmas, Ramadan, and Sinhala and Tamil new year festive tables.
Before making the ribbon cake…
- Please keep in mind that it takes a few hours to completely assemble it.
- Don’t rush, take your time, and have all the ingredients ready before you begin making the cake.
- If you are making the cake for the first time, make the cake at least once before making it for functions.
- This will help you to understand the workflow and resolve any baking mistakes.
- If you are busy, you can divide the work into 2 days.
- Bake the cakes a day ahead, cool, wrap them in cling film and refrigerate.
- Assemble the cake and frost the cake the following day.
Save the recipe to your favourite Pinterest board!
Tips to make the best ribbon cake recipe
- Ingredients for the vanilla ribbon cake
- Make sure the ingredients are weighed and exact.
- Have all your ingredients at room temperature.
- If your sugar granules are big, blitz them in a blender to powder.
- For store-bought powdered sugar, you only need to sift to remove lumps before adding it to the creamed butter.
- Baking pans to make the ribbon cake.
- I am using two, 8″ square pans. Have these baking pans brushed with butter, lined with parchment paper and ready.
- Making the ribbon cake batter.
- Sift flour, baking powder, and salt(dry ingredients) together to distribute the rising agent evenly.
- Cream the butter for two to three minutes. cream until the colour changes to almost white before adding the powdered sugar.
- Add the eggs one at a time, and mix them into the batter. avoid overmixing.
- This would mean using your handheld mixer for 10 seconds for each egg you add to the cake batter.
- Add the flour and milk to the ribbon cake batter.
- Add the flour and butter alternatively.
- Add large spoons of flour(1 cup of flour) and splashes of milk(1/3 cup), mix with your handheld mixer for 10 seconds and repeat.
- Repeat this process and you MUST end the mixing of the batter by adding the flour at the end, not milk.
- Use the handheld blender at low and only run it 3 times around the batter to combine. too much mixing will give you a denser cake.
- Add colour to the batter.
- Have 2 separate bowls and spoons for each batter bowl, to add colouring.
- You want the cake to have pastel shades rather than dark contrasting shades of pink and green. For this purpose use the same measuring spoon for both colours.
- To get the lighter shade, I had to use the 1/8th teaspoon and use only half of it(half of the 1/8th teaspoon). If you have a pipette then getting the even shades would be much easier.
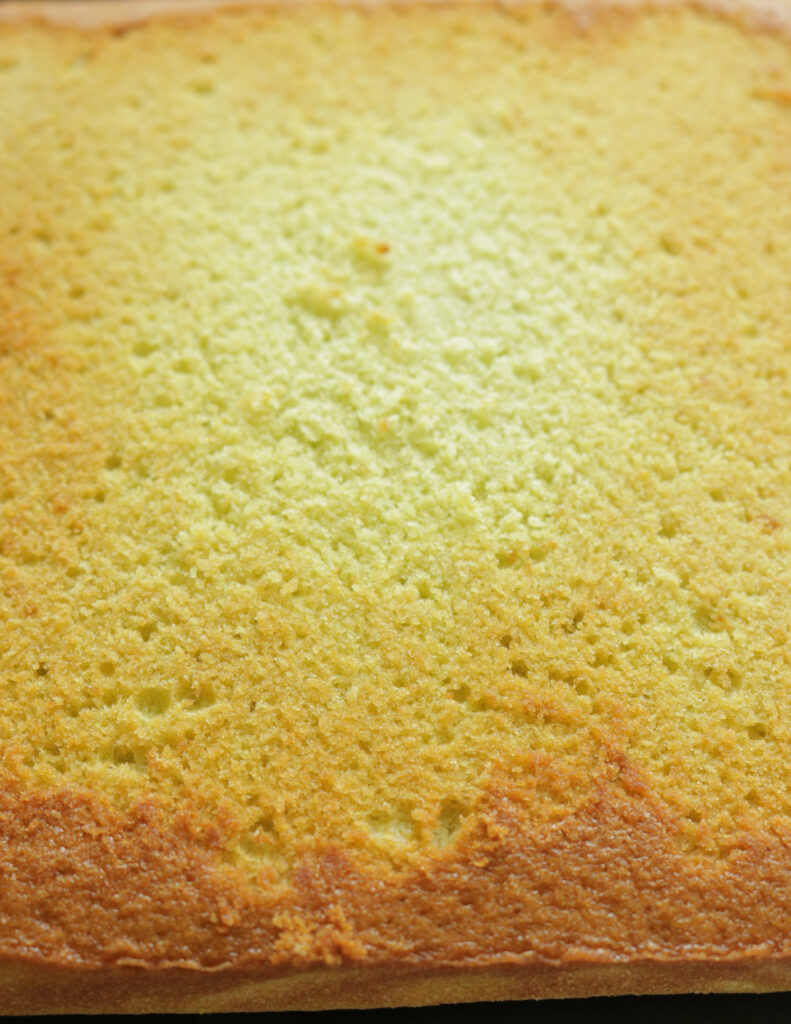
- Once you add the batter to the baking pans, tap them a few times, and gently shake them to even out the layer.
- Once the cakes are baked, let them cool for 12 minutes. Remove them from the baking pan over to a rack or tray to completely cool down.
- Do not frost the cake if it is still warm as this would only lead to melting the buttercream frosting.

- Making the buttercream icing.
- Keep in mind that the following factors affect the texture of the buttercream icing.
- If you live in a hot and humid country.
- If your kitchen retains a lot of heat.
- the heat from the stove.
- If you are wondering why your store-bought cake has beautiful stiff frosting despite the heat and you can’t, the reason is they add shortening to maintain the stiff and beautiful icing.
- You will not be adding shortening, so heat of any kind will have a direct effect on the texture of the icing.
- For this reason, once you make the buttercream icing, place it in the refrigerator to maintain a cool temperature. This means popping the frosting into the fridge a few times as you frost the cake and noticing the frosting softening too much.
My kitchen is so hot and humid with reflective windows that I had to refrigerate the cake constantly while icing the cake. - Every time you remove the buttercream from the fridge give it a good whip to smooth out the frosting before applying.
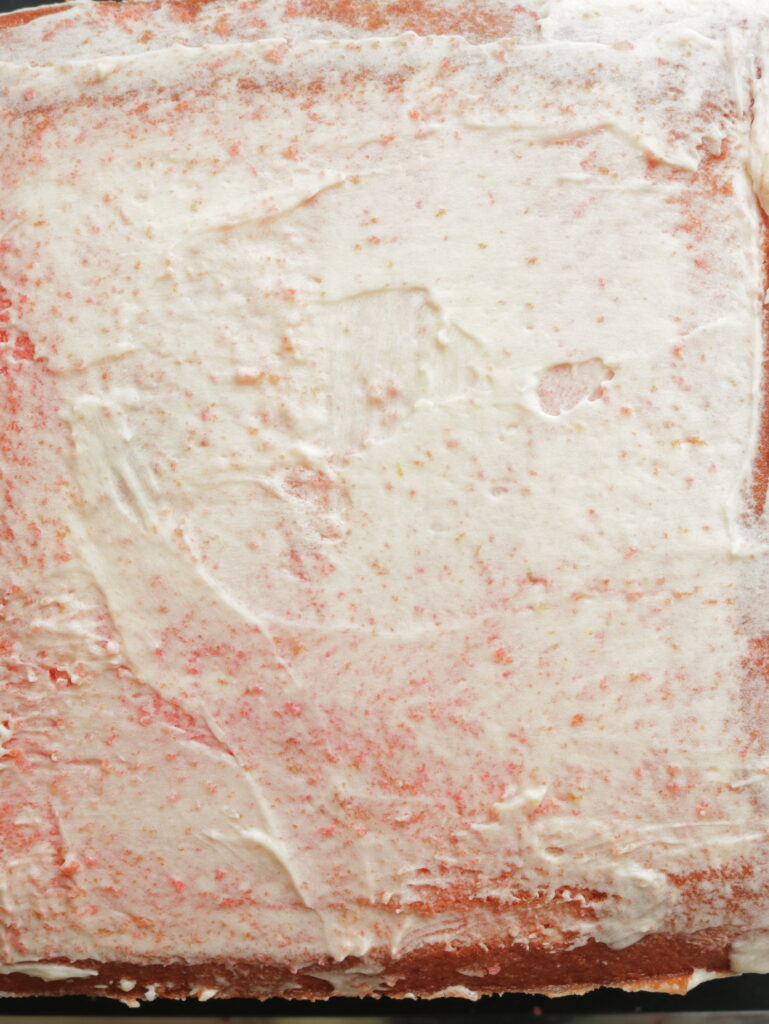
- Crumb coating the ribbon cake.
- Crumb coating is when you add a very thin layer of frosting to capture all the extra crumbs on the cake.
- Once you do the crumb coat, refrigerate the cake for 30 mins-1 hour to cool and turn firm, especially if it is humid in your kitchen. Place the frosting in the fridge as well.
- The next layer of the icing should be a thicker layer.
- Frosting/icing the ribbon cake.
- Frosting the cake entirely or just the top of the cake is your choice.
More cake recipes
- Chocolate cake(one layer of 9-inch cake).
- Soft and fluffy butter cake
- Chocolate loaf cake
- Almond butter cake
RECIPE DIFFICULTY-LITTLE CARE IS NEEDED
How to make ribbon cake
The ingredients mentioned below use standard measuring cups and spoons.
Ingredients to make ribbon cake.
For the cake batter
281g of all-purpose flour(2 and 1/4 cup, I used this conversion calculator to convert grams to cups)
2 and 1/4 teaspoon baking powder
1/4 teaspoon salt
160g of unsalted butter(3/4 cups, unsalted butter is preferable but you can substitute with fat spreads like Astra or Meadowlee if you are living in Sri Lanka)
3 large eggs
300g of sugar(1 and 1/4 cup, granulated or powdered)
1 and 1/2 teaspoon of vanilla
1 cup of milk
green food colouring
Pink food colouring
For the vanilla buttercream
250g of slightly cool, soft butter
500g of icing sugar(sifted)
1/2 teaspoon of vanilla
1-2 tablespoons of fresh milk
yellow food colouring for the icing(only optional)
Edible sprinkles(optional)
Method
If you haven’t read my tips and notes above, please scroll up read and continue with the recipe.
These tips were written by me making the ribbon cake a couple of times so you can avoid them.
Prep work to make ribbon cake.
- Have a medium-sized bowl ready to hold your spatula. The bowl will come in handy when you are not using the hand mixer as it will help you avoid batter dropping onto your workspace.
- To have all ingredients at room temp, remove these ingredients 45 mins to 1 hour from your fridge.
- granulate sugar using a food processor or blender.
- Sift the powdered sugar.
- Combine and sift the dry ingredients to evenly distribute them.
- Brush some butter all around the cake baking pan before lining it with parchment paper. This will allow the baking paper to stay in place.
The batter for the ribbon cake.
Add butter into your mixing bowl.
Cream the butter for 2 minutes on medium-high(speed 2 or 3) until pale and smooth.
Gradually add the powdered sugar(sifted first) into the butter.
Cream the butter and sugar for 2-3 minutes until fluffy and smooth.
There should not be any sugar lumps at this point.
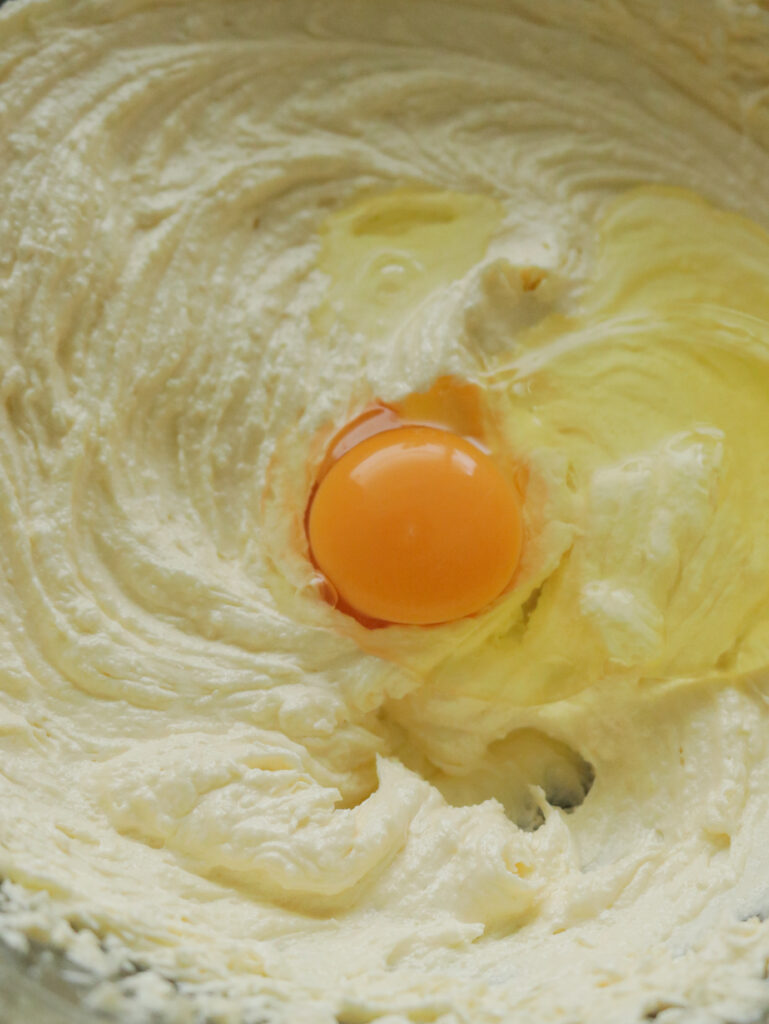
Time to add the eggs into the butter and sugar cream.
Avoid cracking eggs directly into the batter.
Instead, break them into a bowl and then transfer them to the cream.
Add one egg at a time to the cream and blend for 10 seconds for each egg.
Finally, add the vanilla.
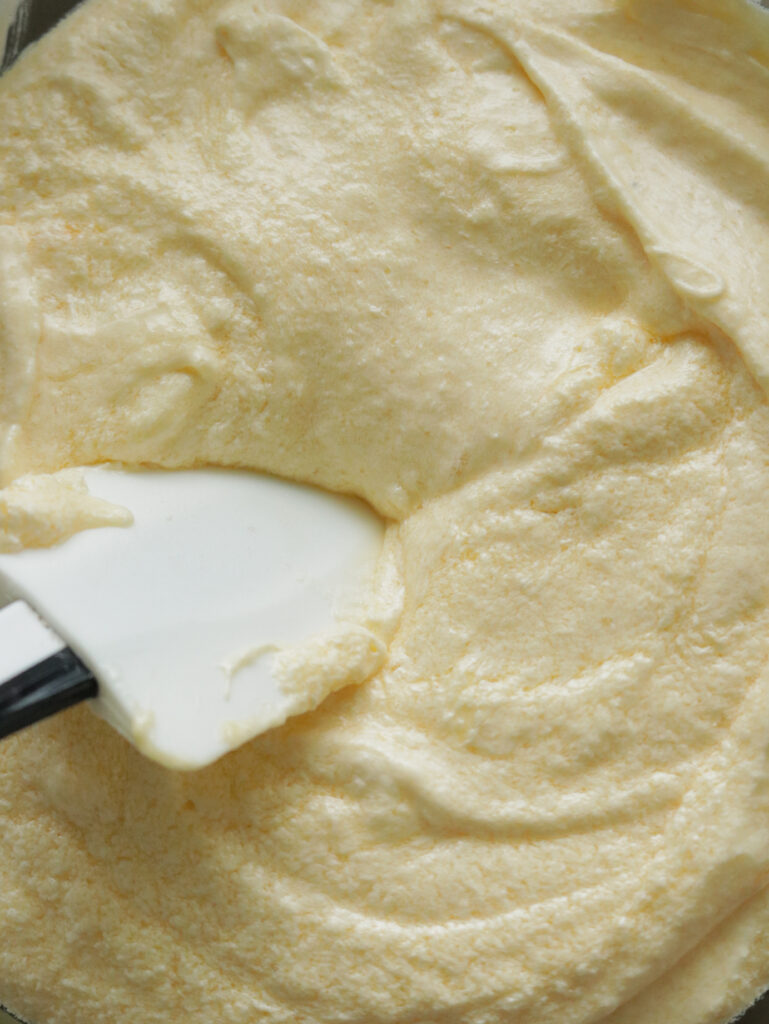
Keep your mixing to a minimum, this would mean, 2-3 rounds from your hand mixer at low-speed(speed 1).
How your batter will look once all 3 eggs are added and minimum mixing is involved.
Mixing flour and milk correctly.
Start with a cup of flour.
Mix for just 5 seconds using your mixer at a low speed.
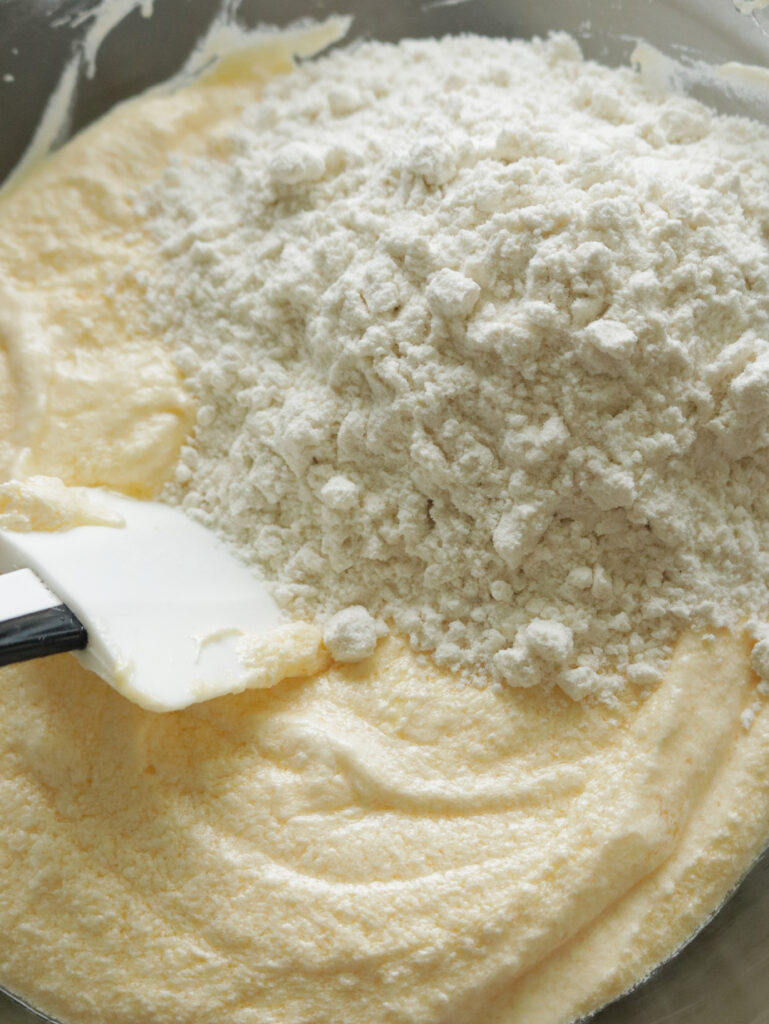
Followed by 1/4 cup of milk, combining for a few seconds.
Repeat the process of adding flour and milk alternatively.
Your last addition should be flour and not milk.
Use minimum mixing and low speed for 10 seconds.
If you still find the ribbon batter not smooth, then replace the mixer and use your spatula and use a wide arc in one direction to mix the batter.
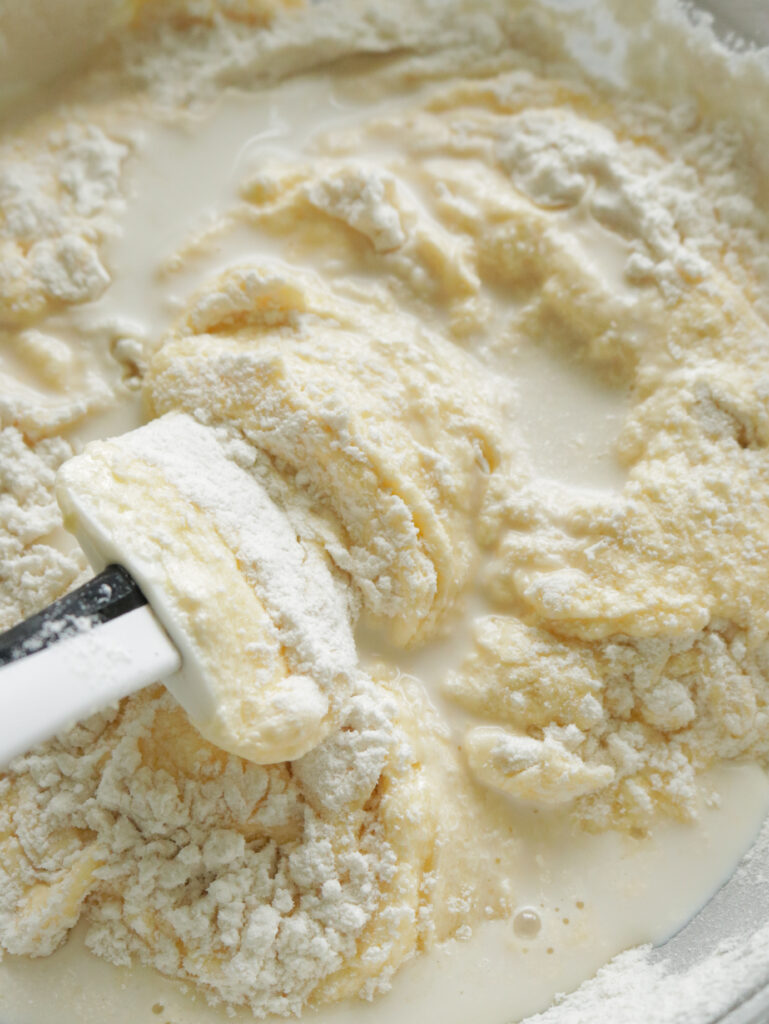
Your ribbon cake batter should look light and airy.
Separating the batter to make a two-layer ribbon cake
Have the two bowls and spoons to be used, close to the batter.
Use a measuring cup to equally separate the batter.
Once you have the two bowls of batter, it’s time to add the colours.
If you do have a pipette then use it to add equal drops of colouring.
Make sure you don’t mix the colours by using the same utensils.
I used my 1/8 teaspoon and only filled it halfway to get a pale but brighter green and pink colour.
Mix them separately to combine and mix in the colour.
You can start preheating your oven at this time to 170C.
How to bake the ribbon cake
Add the batter to each of the prepared baking pans.
Use your spatula to smooth out the cake batter. Make sure to clean the spatula before smoothing the next coloured batter.
Gently shake the batter to level it out.
Tap the pan to remove any air bubbles.
Bake at 170C for 25 minutes. This time will vary depending on your oven, altitude, etc.
The difference would not be much but, keep an eye on the last minute of baking time.
Insert a toothpick into the baked cake, if the toothpick comes out clean, the cake is baked through.
Let the cake cool in the pan until they are cool enough to handle.
Then transfer the cake onto a tray to cool further.
Once the cakes are cool enough and you don’t have enough time to assemble the cake then here’s what you do.
Let the cake completely cool.
Wrap them both with cling film and refrigerate. You can leave the cake to be completed the next day or leave them for a few hours to continue assembling the cake later.
Make the buttercream icing before you remove the cake from the fridge so you can assemble the cake without stopping halfway.
Make the buttercream frosting.
Add butter to the bowl and whisk until pale.
Add the sifted sugar to the butter gradually and mix for a few minutes at high speed.
Add vanilla and continue to mix for 20 seconds. Add milk and mix for another 30 seconds until you have a thick and smooth buttercream.
If you are not using it immediately, refrigerate it until used.
How to assemble the ribbon cake.
Place the first cake(coloured pink on a flat surface, and level the cake by slicing the top of the cake so it’s flat.
Do the same to the second cake(coloured green).
Now place both cakes on top of each other and trim the four sides to give you two equal-size square cakes.
NOTE-If you are going to leave the sides without icing and only frost the top of the cake then avoid trimming the sides at this point.
This will allow you to have a neater finish when you decorate the top and then trim off the sides.
How to crumb coat the ribbon cake
Add a dollop of buttercream icing to the surface(tray or cake board) and place the pink cake on top and press firmly to stick to the tray.
Take one cup of the buttercream frosting to a separate bowl.
Mix for a few seconds and add a thick layer on top of the pink cake as a filling.
Use your spatula to spread out the buttercream frosting.
Gently place the second cake over(green)the buttercream filling, align with the bottom cake, press slightly to set it.
Don’t worry about any buttercream squeezing out of the layers as this can be used as a crumb coat.
Now add a few tablespoons of buttercream on top of the cake.
Use a frosting spatula to add a thin crumb coat on all sides of the cake.
Smooth out the icing, all around and on top of the cake to capture all the crumbs.
Refrigerate for 30-1 hour so the crumb coat sets.
Once the crumb coat sets, fill a piping bag with some buttercream icing and pipe a few lines on top of the cake and around the cake.
Avoid piping the four sides if you are going to trim the sides and only the top of the cake is going to be frosted.
How to cover the ribbon cake with frosting.
Again use a frosting spatula to spread and smooth out this layer of icing to give it a good finish.
Refrigerate again to set for 30-45 minutes.
While the ribbon cake is in the fridge, you can add a few drops of food colouring to the remaining buttercream icing.
For a pale and light yellow frosting, a line of colouring from a toothpick should do.
Once you have the correct tinge, fill a piping bag with the yellow icing.
Remove the cake from the fridge, cut a small opening, pipe the icing as you did before above, and smooth out the yellow icing.
Place in fridge for 20 minutes.
Once the icing is firm, run a fork through the icing in opposite directions all over the cake to give it a little decorative texture.
Wipe around the cake to remove any stray icing drops.
And then add sprinkles(optional).
Refrigerate again to set for 20 minutes and then serve.
You can also leave the sides to show the two-toned colour and add a buttercream layer just on top.
As mentioned above, to leave the sides exposed and for a neater finish you can now trim all four sides to expose
This gives a little lesser sweeter and a more balanced taste of icing and cake to enjoy.
JOIN ME ON ISLANDSMILE YOU TUBE CHANNEL
LOVE SEAFOOD? COME JOIN ME ON MY NEW SEAFOOD BLOG.

ribbon cake(two layer vanilla cake)
Ribbon cake, a two-layer vanilla cake covered in buttercream icing.
Try out this layered vanilla cake recipe for your special occasions.
From birthdays to festivals, you can now make a ribbon cake right at home.
Ingredients
- The ingredients mentioned below use standard measuring cups and spoons.
- For the cake batter
- 281g of all-purpose flour(2 and 1/4 cup, I used this conversion calculator to convert grams to cups)
- 2 and 1/4 teaspoon baking powder
- 1/4 teaspoon salt
- 160g of unsalted butter(3/4 cups, unsalted butter is preferable but you can substitute with fat spreads like Astra or Meadowlee if you are living in Sri Lanka)
- 3 large eggs
- 300g of sugar(1 and 1/4 cup, granulated or powdered)
- 1 and 1/2 teaspoon of vanilla
- 1 cup of milk
- green food coloring
- Pink food coloring
For the vanilla buttercream
- 250g of slightly cool, soft butter
- 500g of icing sugar(sifted)
- 1/2 teaspoon of vanilla
- 1-2 tablespoons of fresh milk
- yellow food coloring for the icing(only optional)
- Edible sprinkles(optional)
Instructions
- If you haven’t read my tips and notes above, please scroll up read and continue with the recipe.
- These tips were written by me making the ribbon cake a couple of times so you can avoid them.
Prep work to make ribbon cake.
- Have a medium-sized bowl ready to hold your spatula. The bowl will come in handy when you are not using the hand mixer as it will help you avoid batter dropping onto your workspace.
- To have all ingredients at room temp, remove these ingredients 45 mins to 1 hour from your fridge.
- granulate sugar using a food processor or blender.
- Sift the powdered sugar.
- Combine and sift the dry ingredients to evenly distribute them.
- Brush some butter all around the cake baking pan before lining it with parchment paper. This will allow the baking paper to stay in place.
- The batter for the ribbon cake.
- Add butter into your mixing bowl.
Cream the butter for 2 minutes on medium-high(speed 2 or 3) until pale and smooth. - Gradually add the powdered sugar(sifted first) into the butter.
- Cream the butter and sugar for 2-3 minutes until fluffy and smooth.
- There should not be any sugar lumps at this point.
- Time to add the eggs into the butter and sugar cream.
- Avoid cracking eggs directly into the batter.
- Instead, break them into a bowl and then transfer them to the cream.
- Add one egg at a time to the cream and blend for 10 seconds for each egg.
- Finally, add the vanilla.
- Keep your mixing to a minimum, this would mean, 2-3 rounds from your hand mixer at low-speed(speed 1).
- How your batter will look once all 3 eggs are added and minimum mixing is involved.
Mixing flour and milk correctly.
- Start with a cup of flour.
- Mix for just 5 seconds using your mixer at a low speed.
- Followed by 1/4 cup of milk, combining for a few seconds.
- Repeat the process of adding flour and milk alternatively.
Your last addition should be flour and not milk.
- Use minimum mixing and low speed for 10 seconds.
- If you still find the ribbon batter not smooth, then replace the mixer and use your spatula and use a wide arc in one direction to mix the batter.
- Your ribbon cake batter should look light and airy.
Separating the batter to make a two-layer ribbon cake
- Have the two bowls and spoons to be used, close to the batter.
- Use a measuring cup to equally separate the batter.
- Once you have the two bowls of batter, it’s time to add the colours.
- If you do have a pipette then use it to add equal drops of colouring.
- Make sure you don’t mix the colours by using the same utensils.
- I used my 1/8 teaspoon and only filled it halfway to get a pale but brighter green and pink colour.
- Mix them separately to combine and mix in the colour.
- You can start preheating your oven at this time to 170C.
How to bake the ribbon cake
- Add the batter to each of the prepared baking pans.
- Use your spatula to smooth out the cake batter. Make sure to clean the spatula before smoothing the next coloured batter.
- Gently shake the batter to level it out.
- Tap the pan to remove any air bubbles.
- Bake at 170C for 25 minutes. this time will vary depending on your oven, altitude, etc.
- The difference would not be much but, keep an eye on the last minute of baking time.
- Insert a toothpick into the baked cake, if the toothpick comes out clean, the cake is baked through.
- Let the cake cool in the pan until they are cool enough to handle.
- Then transfer the cake onto a tray to cool further.
- Once the cakes are cool enough and you don’t have enough time to assemble the cake then here’s what you do.
- Let the cake completely cool.
- Wrap them both with cling film and refrigerate. You can leave the cake to be completed the next day or leave them for a few hours to continue assembling the cake later.
- Make the buttercream icing before you remove the cake from the fridge so you can assemble the cake without stopping halfway.
Make the buttercream frosting.
- Add butter to the bowl and whisk until pale.
- Add the sifted sugar to the butter gradually and mix for a few minutes at high speed.
- Add vanilla and continue to mix for 20 seconds. Add milk and mix for another 30 seconds until you have a thick and smooth buttercream.
- If you are not using it immediately, refrigerate it until used.
How to assemble the ribbon cake.
- Place the first cake(coloured pink on a flat surface, and level the cake by slicing the top of the cake so it’s flat.
- Do the same to the second cake(coloured green).
- Now place both cakes on top of each other trim the four sides to give you two equal-size square cakes.
- NOTE-If you are going to leave the sides without icing and only frost the top of the cake then avoid trimming the sides at this point.
- This will allow you to have a neater finish when you decorate the top and then trim off the sides.
- How to crumb coat the ribbon cake
- Add a dollop of buttercream icing to the surface(tray or cake board) and place the pink cake on top and press firmly to stick to the tray.
- Take one cup of the buttercream frosting to a separate bowl.
- Mix for a few seconds and add a thick layer on top of the pink cake as a filling.
- Use your spatula to spread out the buttercream frosting.
- Gently place the second cake over(green)the buttercream filling, align with the bottom cake, press slightly to set it.
- Don’t worry about any buttercream squeezing out of the layers as this can be used as a crumb coat.
- Now add a few tablespoons of buttercream on top of the cake.
- Use a frosting spatula to add a thin crumb coat on all sides of the cake.
- Smooth out the icing, all around and on top of the cake to capture all the crumbs.
- Refrigerate for 30-1 hour so the crumb coat sets.
- Once the crumb coat sets, fill a piping bag with some buttercream icing and pipe a few lines on top of the cake and around the cake.
- Avoid piping the four sides if you are going to trim the sides and only the top of the cake is going to be frosted.
How to cover the ribbon cake with frosting.
- Again use a frosting spatula to spread and smooth out this layer of icing to give it a good finish.
- Refrigerate again to set for 30-45 minutes.
- While the ribbon cake is in the fridge, you can add a few drops of food colouring to the remaining buttercream icing.
- For a pale and light yellow frosting, a line of colouring from a toothpick should do.
- Once you have the correct tinge, fill a piping bag with the yellow icing.
- Remove the cake from the fridge, cut a small opening, pipe the icing as you did before above, and smooth out the yellow icing.
- Place in fridge for 20 minutes.
- Once the icing is firm, run a fork through the icing in opposite directions all over the cake to give it a little decorative texture.
- Wipe around the cake to remove any stray icing drops.
- And then add sprinkles(optional).
- Refrigerate again to set for 20 minutes and then serve.
You can also leave the sides to show the two-toned colour and add a buttercream layer just on top. - As mentioned above, to leave the sides exposed and for a neater finish you can now trim all four sides to expose
- This gives a little lesser sweeter and a more balanced taste of icing and cake to enjoy.
Recommended Products
As an Amazon Associate and member of other affiliate programs, I earn from qualifying purchases.
-
 Wooden Utensils Set for Kitchen, Messon Handmade Natural Teak Cooking Spoons Wooden Spatula for Nonstick Cookware, 7 Set
 -
 Pyrex Glass Measuring Cup Set (3-Piece, Microwave and Oven Safe),Clear
 -
 Hudson Essentials Stainless Steel Measuring Cups Set - 6 Piece Stackable Set with Spout
 -
 Kootek 177 Pcs Cake Decorating Kits Supplies - Aluminium Alloy Revolving Cake Turntable, Numbered Cake Decorating Tips and Frosting Tools for Baking Cupcake Cookie Muffin Kitchen Utensils
 -
 SHARDOR Hand Mixer Electric, Handheld Mixer With 2x6 Speed, Electric Mixer for Dough, Egg, Cake, 5 Stainless Steel Accessories, Snap on Storage Case
 -
 Duralex LYS Mixing Bowl Set, 10 Piece, clear
Nutrition Information:
Yield: 20 Serving Size: 1Amount Per Serving: Calories: 383Total Fat: 18gSaturated Fat: 11gTrans Fat: 0gUnsaturated Fat: 6gCholesterol: 73mgSodium: 138mgCarbohydrates: 53gFiber: 0gSugar: 42gProtein: 3g
Nutrition facts are an estimate and not guaranteed to be accurate. Please see a registered dietitian for special diet advice.
Each recipe on this blog has been written with great care and love to the best of my ability with you in mind.
It’s free and on the blog, for you to try anytime.
All I ask is that you do not save it on any apps, recipe boxes, or online groups which will affect me as a food blogger and the growth of this blog.
I would appreciate it if you only share the link rather than the full recipe.
All images and text on this website are protected by copyright.
Chamalka Rupasinghe
Thursday 28th of September 2023
The recipe looks awesome, but I gave up on the idea of buying butter since last year so will the buttercream frosting taste bad if I use astra instead of butter? And most of all thanks for the recipe!
jehan
Saturday 30th of September 2023
Hi chamalka, you can use astra for the frosting. I can't see any problem substituting butter with margaring which I have done. regards, J
jehan
Friday 29th of September 2023
Hi Chamalka, thank you, butter is expensive in Sri Lanka, I used astra to make the cake as well, the only problem I've found in using it is to get the consistency of the frosting and making sure to store the frosting in the fridge until used. it tends to become almost runny left out if the weather is too hot. other than that, you should be fine using astra margarine. hope this helps. regards J
Renuka Marshall
Friday 14th of January 2022
Hi! Tried this for the first time and it came out beautifully. The recipe and instructions were super easy to follow. Thank you!
jehan
Friday 14th of January 2022
Hi Renuka, You are most welcome and thank you for trying out the recipe. Appreciate it if you can give a star rating on the recipe. this will encourage other readers to try the recipe as well. Regards, J