Ghee is a type of clarified butter that is traditional in Indian cuisine. This nutty flavored and high smoke point fat has been used for thousands of years, with deep roots in Ayurvedic practices. Making desi ghee at home is simple, easy and cost effective and will render much better flavor than commercially available varieties. Follow along with me as I show you how to make homemade ghee recipe in the traditional Indian way with the help of step-by-step photos and video!
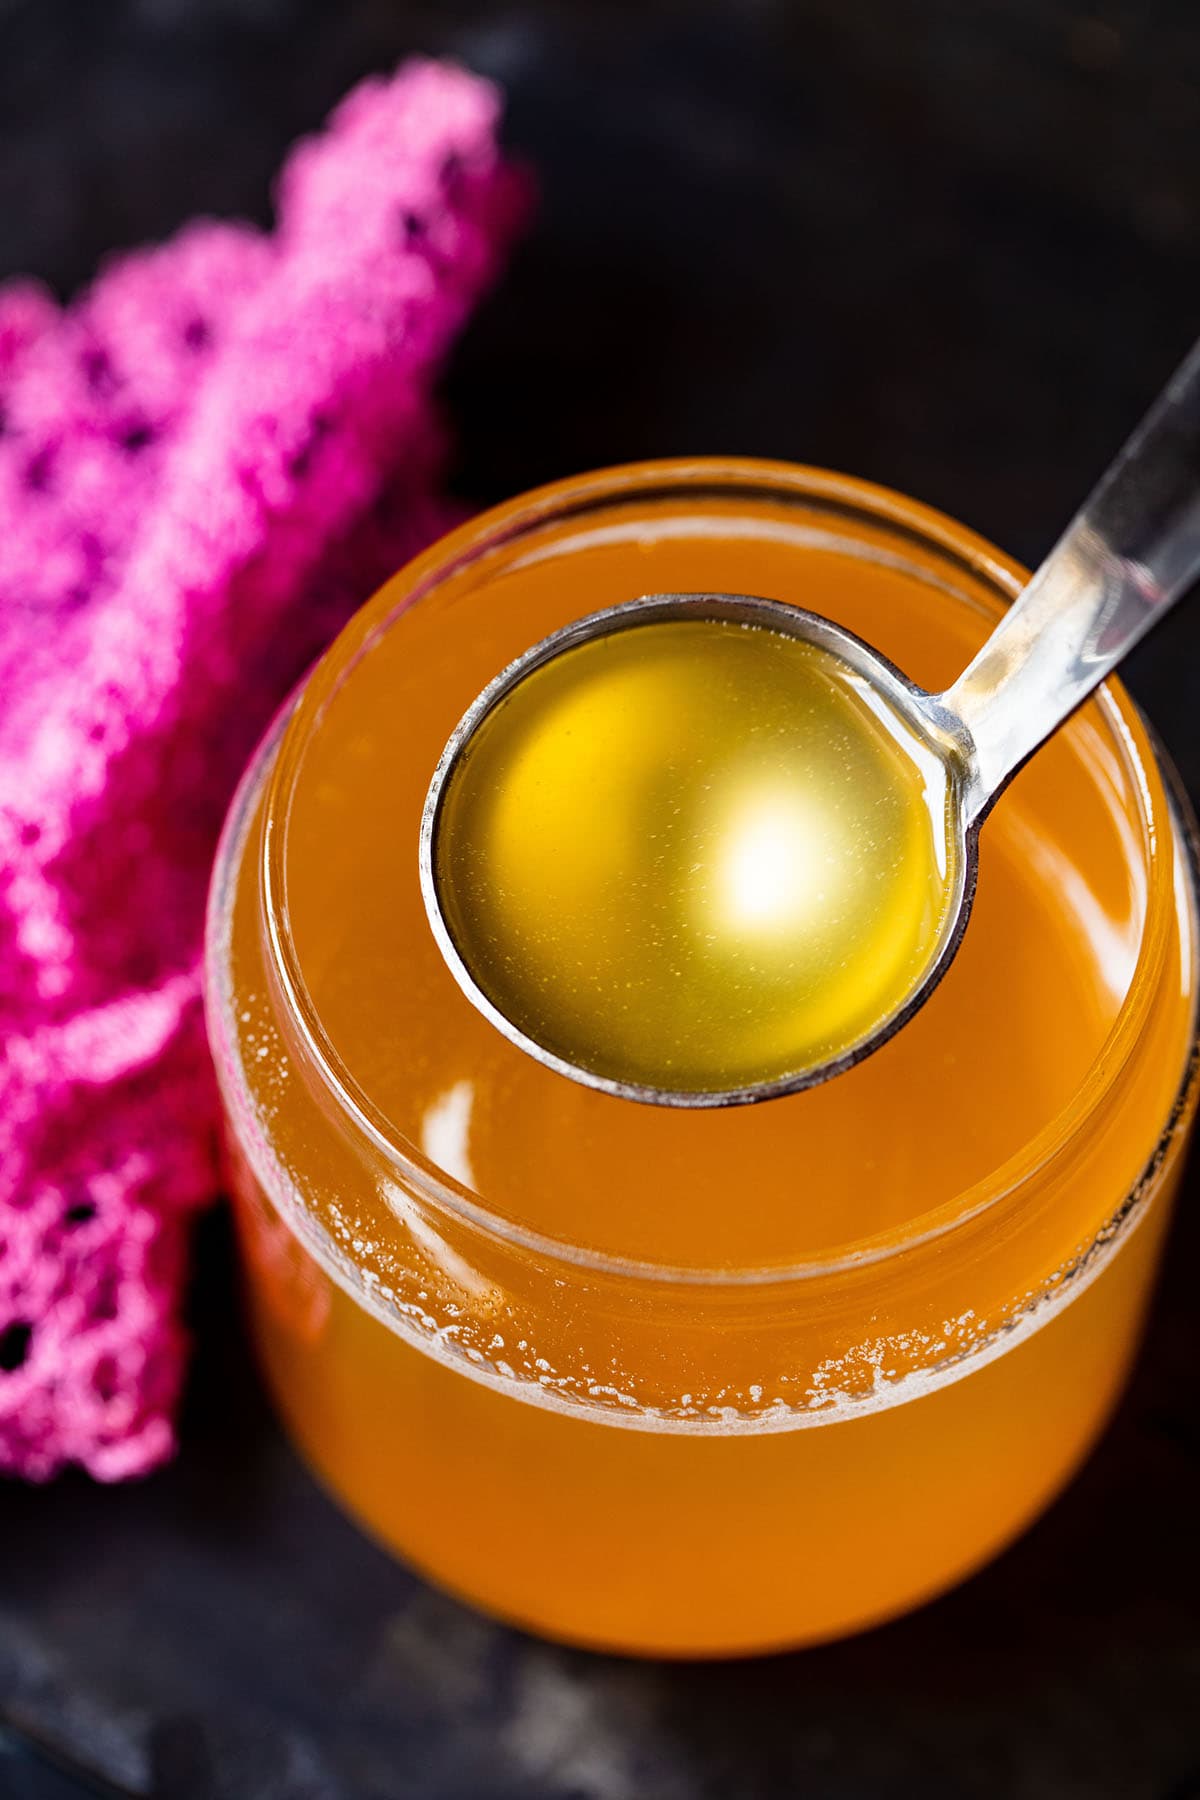
Table of Contents
What is Ghee
Ghee is a kind of clarified butter made by simmering butter on low heat, which results in the caramelization of milk solids.
The fat is then strained, removing all the milk solids. The resulting clear, delicious, golden liquid fat is what is known as ghee.
Ghee has been made in India for centuries and is widely used in the Indian cuisine. It has a much higher smoke point than regular butter, making it an excellent fat for high heat cooking.
It also happens to be shelf stable (meaning no refrigeration is required) and is even appropriate for people with lactose intolerance.
Ghee is also lauded as an Ayurvedic superfood with anti-inflammatory and digestion aiding properties.
High in Omega-3 and -6 fatty acids, DHA, as well as in vitamins A, D, E and K, this butterfat breaks the mold and is even being accepted as a healthful food by western medicine standards.
Ghee is so important to both Indian cuisine and identity. Ghee is considered to be one of the highest offering in the fire rituals that are called as as Havan or Homam in the Hindu culture. Ghee is also a part of panchamrit that is offered to the deities.
Do note that the ghee offered in the havan ritual should be made from cow’s milk and not buffalo’s milk. Cow’s milk is considered satvik and buffalo’s milk is considered tamasic.
Now that you know how wonderful ghee can be, let’s set about making some of our own, shall we?
The Importance of Using Cultured Butter
Traditionally, desi ghee recipe is made from cultured cream or curd (yogurt) that comes from locally sourced, grass fed Desi cows.
This cultured cream or yogurt is then churned to get cultured butter. Only then is the butter heated and slow simmered to get ghee.
There was a time I would follow the age-old process of making homemade cultured butter to use for making ghee. Now, due to lack of time, I use store-bought unsalted cultured butter.
For this ghee recipe, be sure to procure unsalted, grass fed and preferably organic butter from Desi cows, as this will result in the most traditional tasting ghee and will be easy to digest.
For more than 10 years, I have been wanting to share this ancient practice with you, and the time has finally come!
In just 20 to 25 minutes you can have beautiful homemade ghee that is so much better tasting (and healthier for you!) than pre-packaged varieties.

What Can I Make With Ghee
Plenty of Indian food is made in ghee. We not only use ghee as the fat to make lentils, curries, veggies and rice based dishes but also make many of our sweets with it.
It is the preferred fat in Indian cooking (even over butter and oil), especially for sweets and dishes like Biryani and rich curries.
- Use it to sauté, stir-fry or roast your veggies. The high smoking point of ghee helps when you stir fry, bake or roast veggies at a higher temperature.
- Toast your bread with it, or spread it in place of butter on your toasted bread. You will be surprised at how good toast can be with ghee! It is one of my favorite ways to eat toasted bread.
- Add a few spoons on top of Indian food like Khichdi, Dal Tadka, Kadhi while eating. The good fats in ghee helps to digest the food easily.
- Spread it on your Roti or Naan or Pita Bread.
- Roast Paratha in ghee instead of oil.
- Make your Bread loaves and dinner rolls with ghee as the fat.
- Use it in Indian sweets like Carrot Halwa, Kheer, Besan Ladoo and many more.
- Deep fry your food in it.
- Bloom your spices in it.
You can also use ghee for the Ayurvedic practice of oil-pulling!
How to Make Ghee
Melt Butter
This recipe for making homemade ghee recipe is quite simple. That said, please note that you should remain in your kitchen for the entirety of this process.
Ghee can go from caramelized to burnt in a flash! Stay attentive and vigilant so you get the best quality ghee around.
I have also read that one should make ghee during the full moon. The energies of the moon are infused in the ghee if you make it on a full moon day.
1. Grab a large, heavy-bottomed pot or pan. Chop butter roughly and place in the pan covering the entire surface of the pan evenly. For this ghee recipe, I have used a 3 litre (3.17 quarts) pot.
For this ghee recipe, I have used 500 grams of unsalted cultured butter. You could scale the recipe to make a small or big batch by using any amount of butter. If you plan to make a larger batch, make sure to use a large pot or pan.
TIP: The pot has to be large and heavy. A smaller pan will cause the melted butter to spill over while bubbling and frothing. A lighter thin bottomed pan can make the butter or ghee burn too fast.
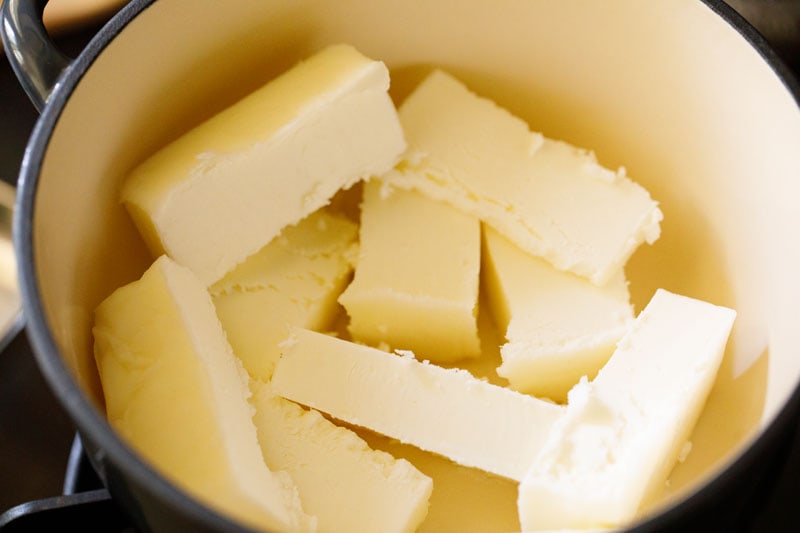
2. Place pan on stovetop and heat on medium-low to medium heat. The butter will begin to melt.

3. Stir in intervals when butter begins to melt to assist the larger pieces.
Simmer Butter
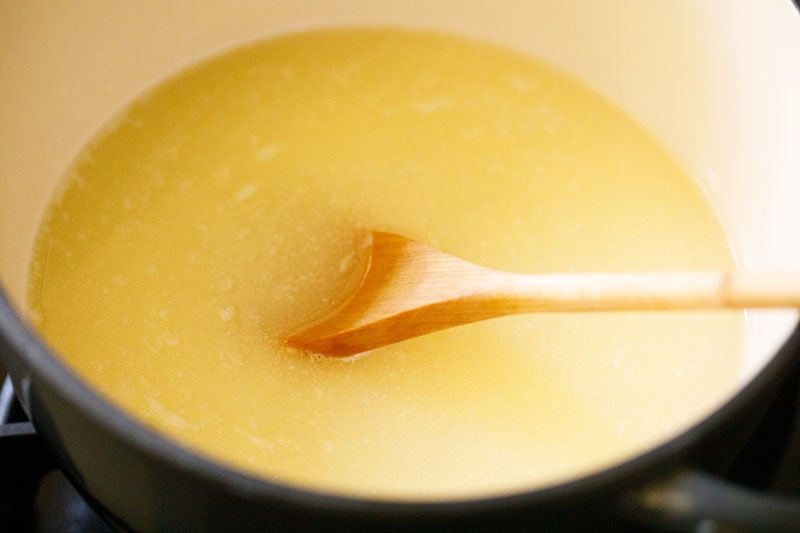
4. When all the butter has melted, reduce heat to the lowest setting and simmer gently.

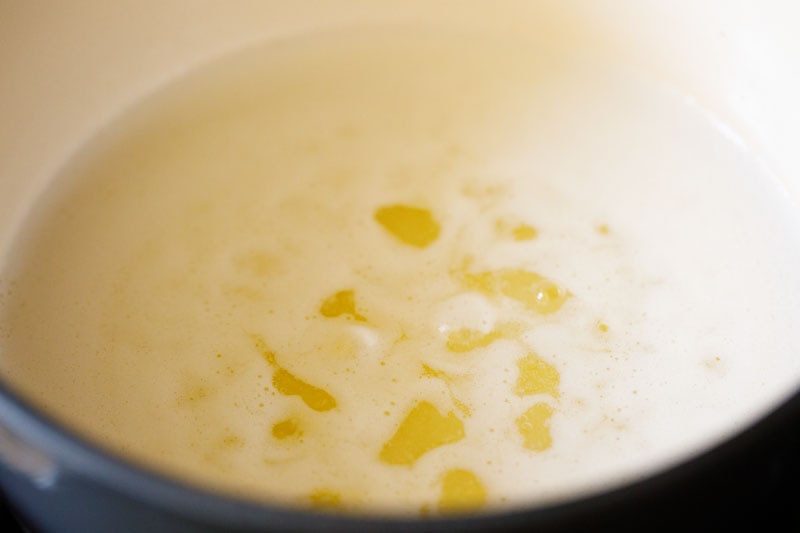
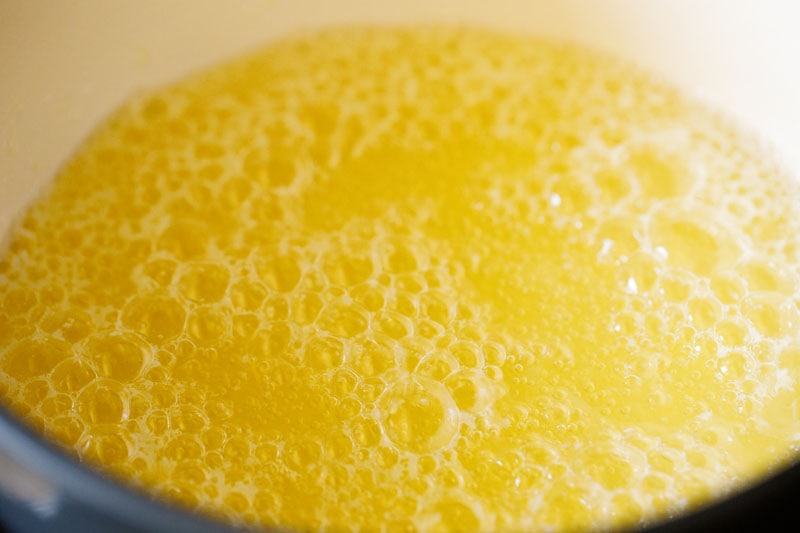
5. About a minute or so after all the butter is melted, you will hear sounds from the bottom of the pan and see milk solids appearing on the surface.
6. The entire surface will be covered with milk solids. Continue to simmer.
You will see the color change gradually to a from a buttery, pale yellow to light golden with the butter bubbling and shimmering.
The bubbling and frothing is due to the water present in the butter.
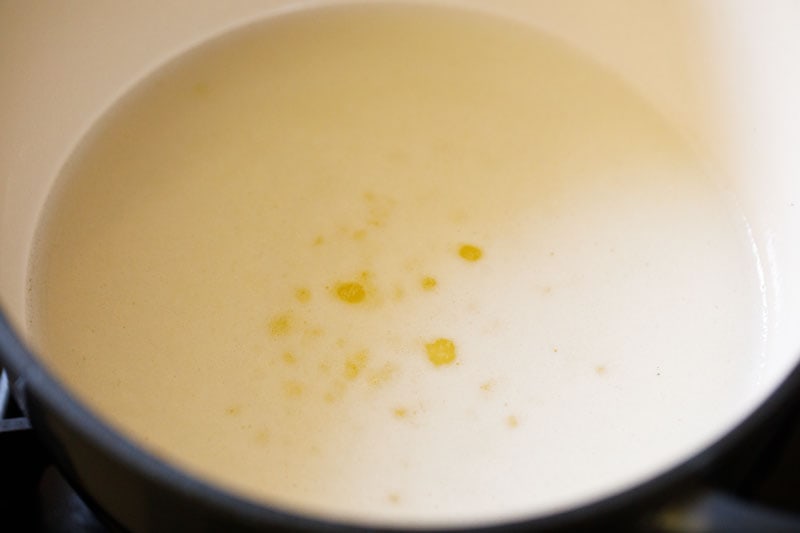
7. Continue to stir occasionally.
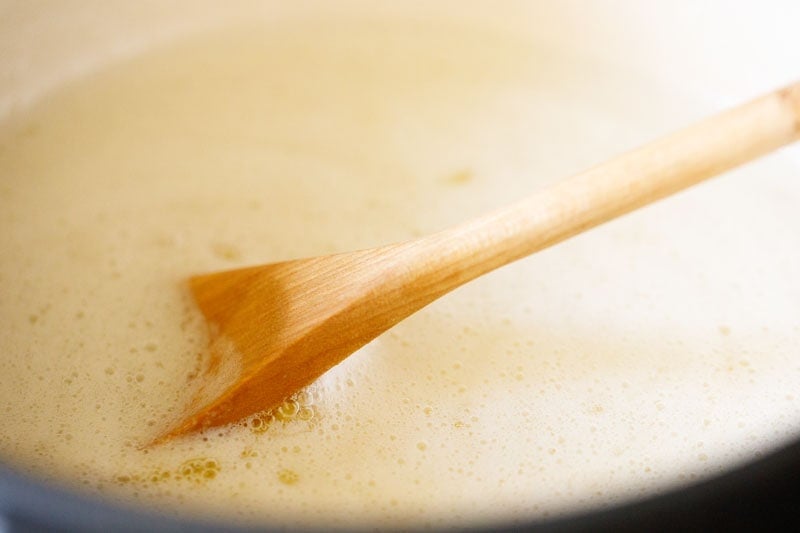
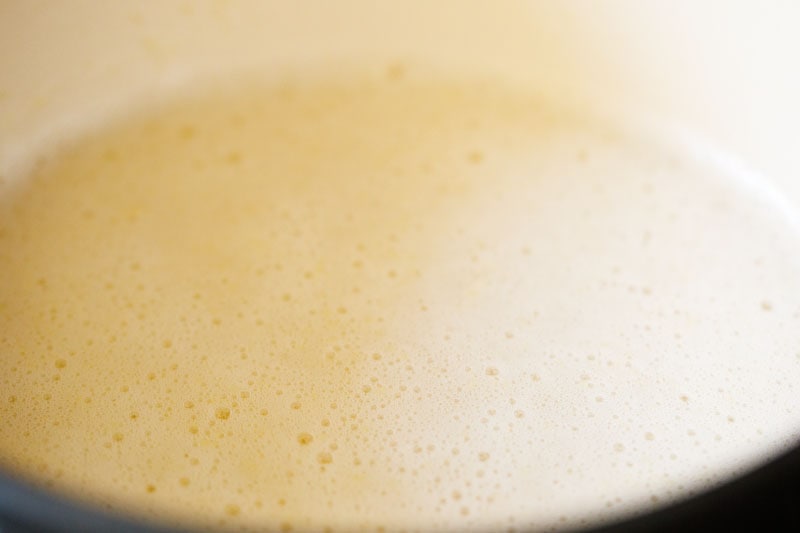
8. After some time, the milk solids will begin to settle at the bottom and the surface will start to look clearer.
9. Continue to simmer for a couple of minutes after all the milk solids have settled.
TIP: I prefer to use a light colored pan so that I can see the color of the milk solids at the bottom when I stir.
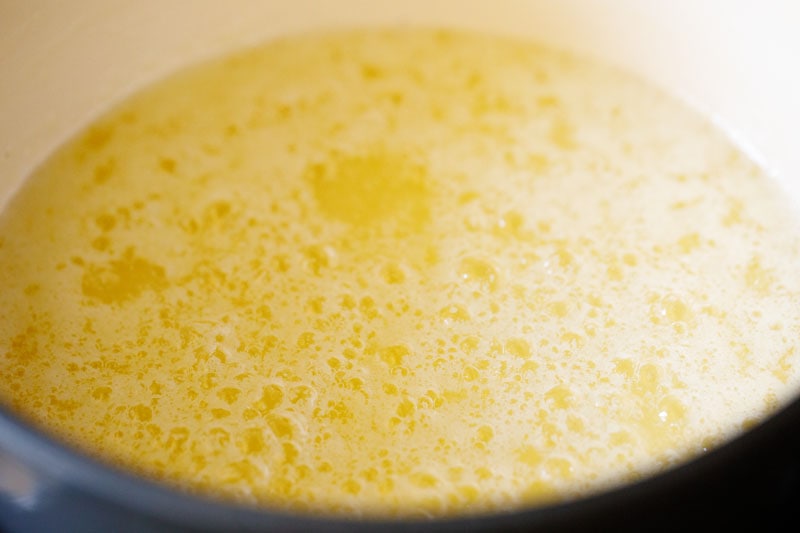
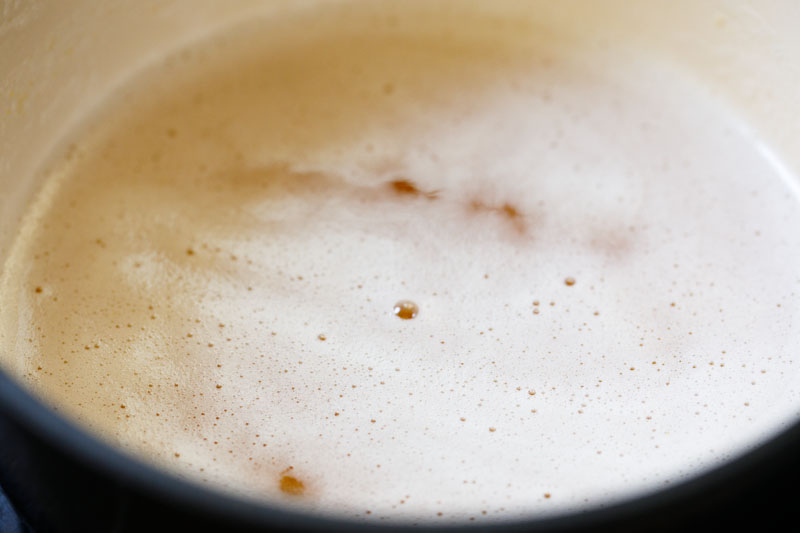
10. When you see medium to large sized bubbles forming on the top and the entire mixture is bubbling, you are almost done! Continue to simmer for a 1 to 2 minutes more.
TIP: If you keep the pan on the heat for too long, the milk solids will get too browned or even burnt. You must be attentive here!
Set Pan Aside
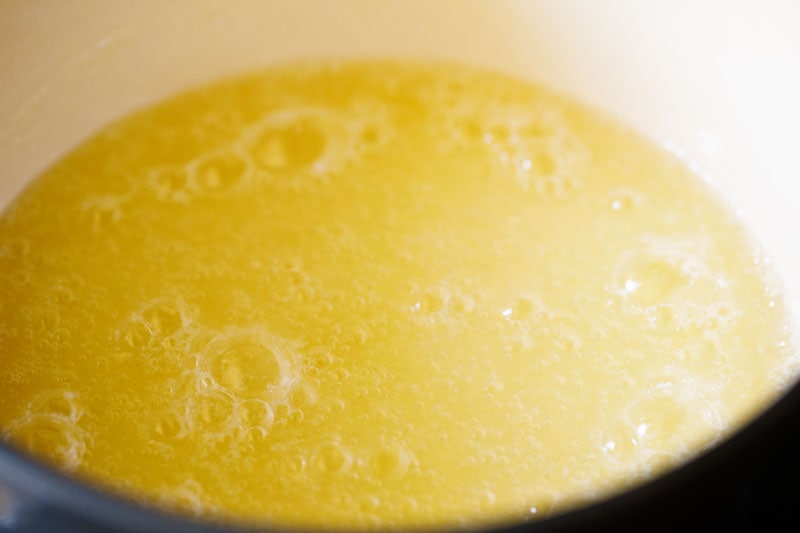
11. Remove from heat and place the pan on the countertop. You will see a layer of fine tiny bubbles on the top. Don’t worry – these bubbles go away as the ghee gradually cools.
12. The milk solids will begin to caramelize and turn golden from the residual heat, and you will see the color of ghee become darker.
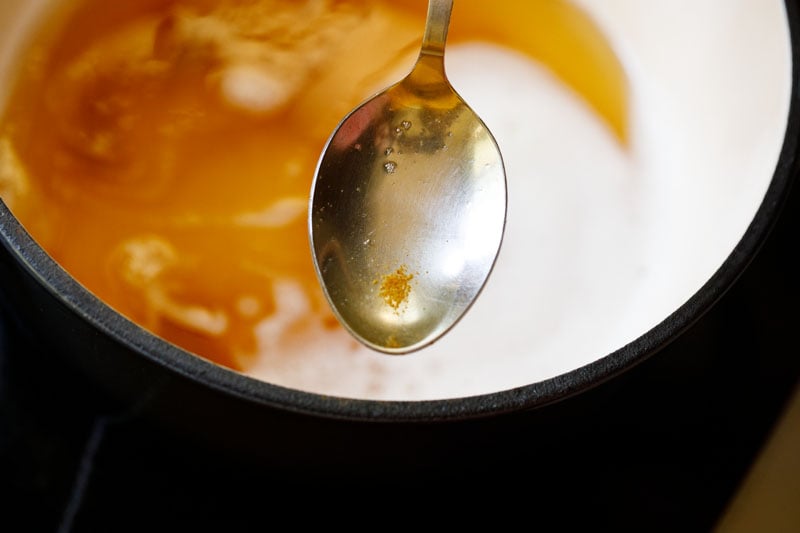
13. Wait until all the simmering stops and you see the browned bits of milk solids at the bottom.
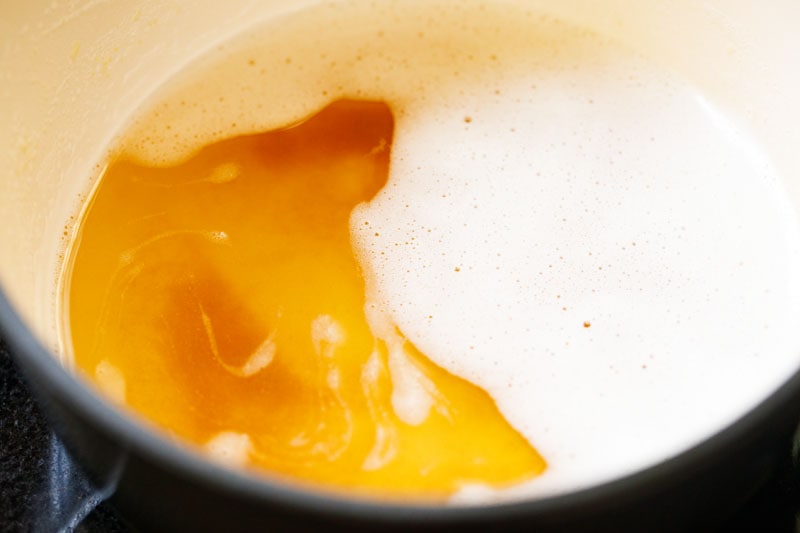
14. Here is another photo of the browned milk solids.
Strain Homemade Ghee
15. While the ghee is still hot, pour it through the strainer or cheese cloth placed on top of a glass jar. If your pan isn’t very heavy, simply lift it and pour the ghee. I used a heavy ceramic coated cast iron pan, so using a ladle made this process easier.
TIP: Make sure the glass jars are heat proof as the ghee will be hot and can shatter glass that isn’t tempered! I find mason jars are perfect for this. Or you can use steel jars.
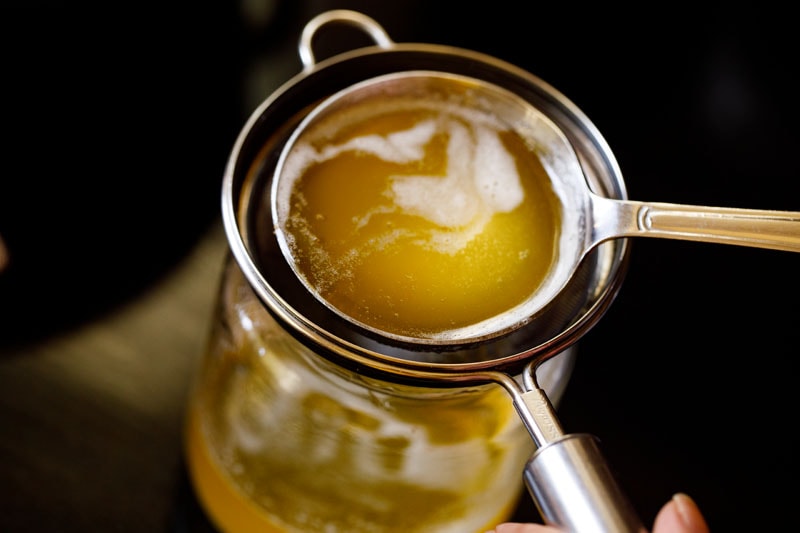
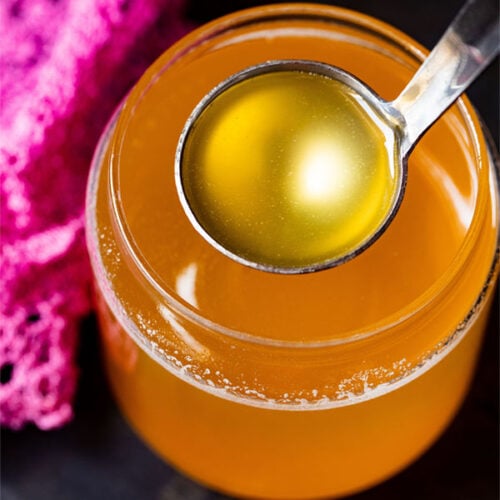
16. Here’s the liquid gold ghee in a jar. Close tightly when the ghee cools. Store in a cool dry place.

17. Use ghee as required. I recommend pulling out enough ghee for a week or so worth of cooking and keeping it in a small container in the kitchen. Store the rest in a cool, dark spot in the pantry for best storage. If stored well, ghee can last up to one year at room temperature.
TIP: Always use a clean dry spoon to remove ghee so that you don’t end up contaminating it.
I usually make ghee from 500 grams butter, which usually lasts me for about a month or so.

Different Ways of Making Ghee
While I usually follow the simple recipe above for making ghee quickly, there are other ways of making it as well. Ghee recipe can be made from cream or yogurt as well! Read on below to see how it’s done.
How to Make Cultured Butter from Malai or Cream
I used to make ghee with this Homemade Butter. While it is very delicious, it is much more time consuming than using purchased cultured butter.
You begin by first collecting the cream that floats on top of milk after it is boiled and cooled. Keep collecting these layers of cream (called malai in Hindi) in a freezer safe box. Store covered in the freezer.
When you have about 2 to 3 cups of this cream, remove it from the freezer and place the container of it in your refrigerator overnight.
The next day, remove the cream from the refrigerator. Add ¼ cup curd (yogurt) to 2 cups cream and mix well. Keep it at room temperature for 9 to 12 hours. This will add some good bacterial culture to the cream and the cream will thicken and set.
I find the Instant Pot handy when it comes to setting and culturing the cream. Use the yogurt settings and set the time to 9 hours on normal mode. You do not need to warm the cream before adding the yogurt.
When your cultured cream is ready (after 9 to 12 hours), pour all of it in a blender or stand mixer. Add about ¼ to ½ cup ice cold water and blend until the butter separates from the cream.
When you see the butter separating, collect the butter with a strainer or clean hands draining all the buttermilk.
TIP: Don’t toss the liquid! Store the buttermilk and use it to make pancakes or cakes, muffins, or breads.
You now have homemade cultured butter. Either refrigerate it or use it straightaway to make ghee using the steps for the recipe above.
Ayurvedic Method of Making Ghee with Curd
The Vedic or Ayurvedic method of making butter for ghee is different than blending cream. The ghee recipe here is made from curd (yogurt) that is made with the milk from grass fed indigenous Desi cows, and not the more common jersey cows.
This process also requires a specialized hand churner called a ‘bilona’ (pronounced BEE-low-na).
The curd is added to the bilona pot and is then hand churned by pulling a rope that moves the rod both clockwise and counter-clockwise.
It is this moving of the rods in opposite directions that help to separate the butter from the curd. The process of churning in opposite directions is known as ‘manthan‘ in Hindi.
In recent years, the process of making Ayurvedic ghee has been commercialized through the use of engine driven bilonas.
Do not attempt this in a blender as you won’t get any butter. Trust me! I have tried and failed. The blender blades move in only one direction, and as a result the butter does not separate. So interesting, right?
Making Ghee from Cream
Ghee can also be made with cream that hasn’t been turned into butter. The cream is slow cooked and simmered until the milk solids separate, then caramelize and you get the golden colored ghee. Just note that this process of cooking the cream takes more time than if you use butter instead.
FAQs
Ghee is sometimes used interchangeably with the term “clarified butter,” but it is actually different from clarified butter. In ghee, the milk solids are caramelized which give it a deliciously nutty, almost sweet flavor.
Clarified butter, on the other hand, refers simply to butter where the milk solids are simply skimmed off and not caramelized.
Some folks like to flavor their ghee with moringa leaves or curry leaves. If you want a flavored ghee, then add a few strands of either moringa leaves or curry leaves when you place the ghee pan on the countertop.
The leaves cook and become crisp, releasing their flavors in the fat. Strain the ghee and discard the stems or leaves.
If stored appropriately, ghee can last for up to a year without refrigeration. Be sure to keep it away from heat, light and anything that can introduce bacteria. If the ghee begins smelling “off,” scrape away the top layer and move it to the refrigerator for safer storage.
Yes! The process of making and straining the ghee removes the lactose and casein from the fat, making it perfectly suitable for lactose intolerant folks.
More DIY Recipes!
Gluten Free Recipes

DIY & Collections
DIY & Collections

DIY & Collections
Please be sure to rate the recipe in the recipe card or leave a comment below if you have made it. For more vegetarian inspirations, Sign Up for my emails or follow me on Instagram, Youtube, Facebook, Pinterest or Twitter.
How to Make Ghee | Homemade Ghee Recipe
Ingredients
- 500 grams Butter – unsalted, preferably cultured
Instructions
Cook and Simmer Butter
- Take a large, heavy-bottomed pot or pan. Chop butter roughly and place in the pan covering the entire surface of pan evenly.
- Place pan on stovetop and heat on medium-low to medium heat. The butter will begin to melt.
- Stir in intervals when butter begins to melt to assist the larger pieces. When all the butter has melted, reduce heat to the lowest setting and simmer gently.
- About a minute or so after all the butter is melted, you will hear sounds from the bottom of the pan and see milk solids appearing on the surface.
- The entire surface will be covered with milk solids. Continue to simmer.
- You will see the color change gradually to a from a buttery, pale yellow to light golden with the butter bubbling and shimmering. Continue to stir occasionally.
- After some time, the milk solids will begin to settle at the bottom and the surface will start to look clearer.
- Continue to simmer for a couple of minutes after all the milk solids have settled.
- When you see medium to large sized bubbles forming on the top and the entire mixture is bubbling, you are almost done! Continue to simmer for a 1 to 2 minutes more.
- Remove from heat and place the pan on the countertop. You will see a layer of fine tiny bubbles on the top. Don't worry – these bubbles go away as the ghee gradually cools.
- The milk solids will begin to caramelize and turn golden from the residual heat, and you will see the color of ghee become darker.
- Wait until all the simmering stops and you see the browned bits of milk solids at the bottom.
Strain Ghee
- While the ghee is still hot, pour it through the strainer or cheese cloth placed on top of a glass jar.
- If your pan isn't very heavy, simply lift it and pour the ghee. I used a heavy ceramic coated cast iron pan, so using a ladle made this process easier.
- Use ghee as required. I recommend pulling out enough ghee for a week or so worth of cooking and keeping it in a small container in the kitchen.
- Store the rest in a cool, dark spot in the pantry for best storage. If stored well, ghee can last up to one year at room temperature.
Video
Notes
Nutrition Info (Approximate Values)
This Ghee Recipe post from the archives first published in April 2021 has been republished on 23 August 2021 and updated on 30 July 2022.

Hello again and thank you for your last reply. Does it really make a great difference by using cultured butter? So would be worth seeking out and if not what should i look out for in the supermarket or brand? (I am UK based). Regarding when you pour it through a strainer, do you pour the whole contents of the pan? Many thanks.
Hi John, yes it does make a difference as the flavor and taste with cultured butter is better. If you do not get cultured butter, opt for unsalted plain butter (any good brand) preferably without any preservatives, colors or additives. Yes the whole content is poured. You can pour through a ladle part by part or if the pan is not heavy, lift it and pour the entire contents. Use a fine mesh strainer.